

.svg)

.svg)
.svg)
.svg)
.svg)
.svg)
Did you ever feel the heat as an online business when you found yourself losing big because of form issues?
Forms are essential to collecting leads and payments.
What if the friction in the process frustrates the user? Will it not bring down conversions?
It becomes even more annoying because many users must be interacting with your website for the first time. It negatively affects the user experience and your overall brand image.
As forms are directly responsible for boosting conversions, it becomes pivotal that the majority of your forms convert.
Major Issues Users Complain About Online Forms
For agencies, it becomes quite a task to manage forms coming from different sources because of their varying types. Device incompatibility can further complicate the issue.
Forms management is easier said than done, and you can't tackle it in a day or two. It can be challenging even if you are a small agency owner, as you might need to source and process forms from various third-party softwares and platforms.
That's the reason you need a robust and smart forms management tool. Your forms App should be able to create dynamic forms and enable real-time reporting, a seamless distribution process, and comprehensive document management.
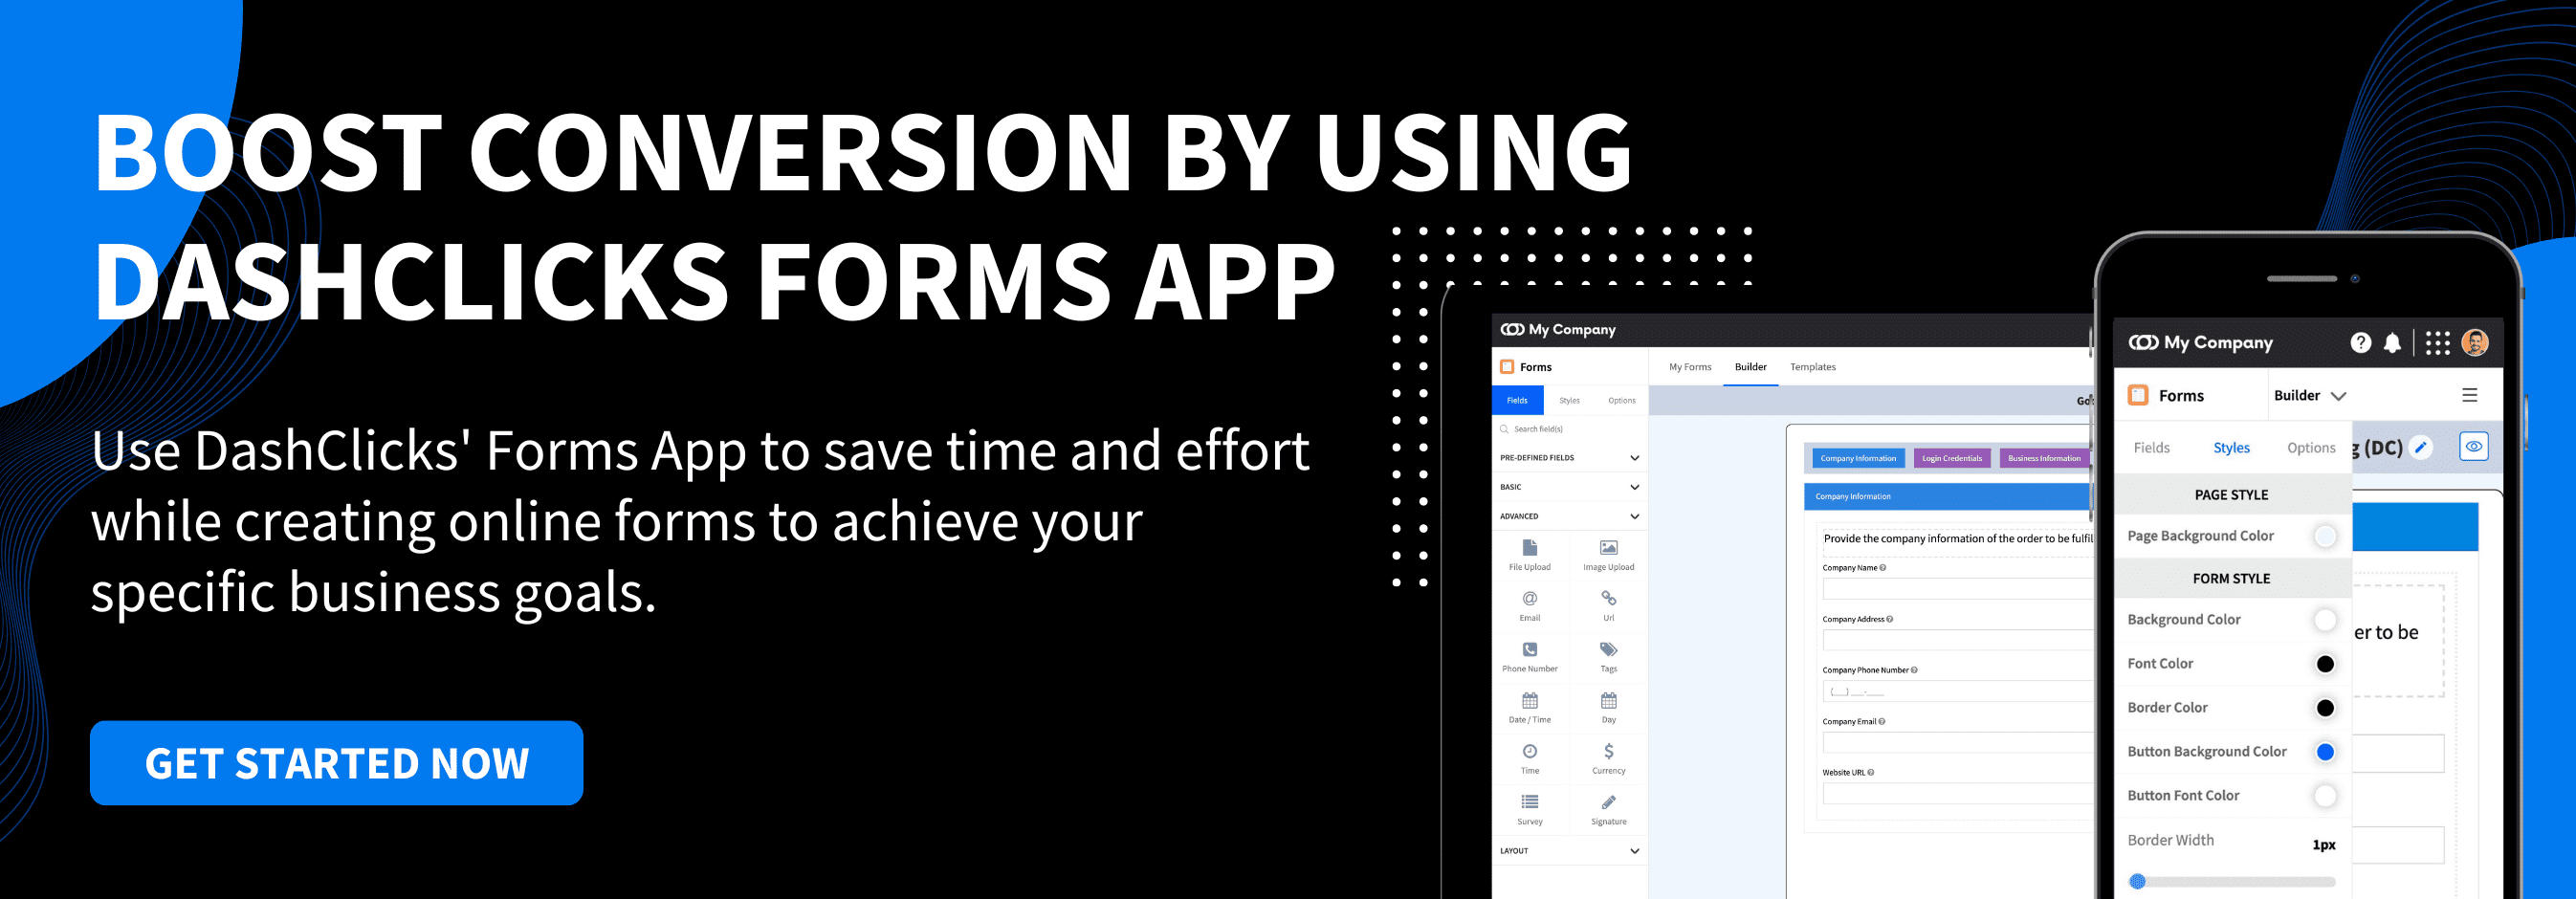
DashClicks Forms App comes to your rescue here.
You can swiftly manage forms across different channels and enhance user experience using the DashClicks Forms App. It's a white-label automation tool that will transform data collection into an incredible experience. It improves your workflow designed to meet your every need.
What's more, it will dramatically improve the conversion rate on your website.
This article will discuss the Forms Application and how it works.
What Is the Forms Application?
The Forms application is a marketing automation tool created by DashClicks, the popular white-label platform for digital marketing agencies. With this App, you can quickly create, share, and embed forms on your websites and landing pages and resolve all your forms-related woes.
Replace default forms on other platforms with the forms created by the Forms App and make your life easier by bringing all your lead information to one place.
We will walk you through the various features of this intelligent App so that you can use it like a pro.
How to Use the Forms App?
Watch this video to learn more about Forms App.
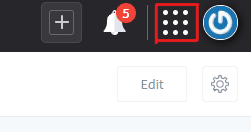
How to Access the App?
Go to your DashClicks dashboard and open the app drawer in the top right corner.
How to Navigate the Forms App?
Click the Forms icon to reach the home page of the Forms app - My Forms.
1. My Forms
My Forms is the tab providing an overview of all the forms you created with updated information on submissions and pending requests.
Since you haven't started using the App, you won't find any forms in the table. However, you would still be able to see the column titles. These titles are listed below.
2. Form Type
This column is created to categorize your forms into three major types: Card, Classic, and Group.
3. Form Name
The terminology of the forms happens right at the moment they are created.
It's primarily dependent on the campaign it's created for and its general purpose.
4. Submissions
This section provides us with the number of submitted forms by the users.
5. Pending Requests
Many users might not fill up the forms at any point in time, despite your invitations. This column will highlight those users who haven't responded to your request and need a reminder.
6. Date Created, Last Updated
As evident from the column title, it provides you with the date you created the Form and last updated it.
7. Categories, Tags
By default, you'll not find any details in these two columns. You can manually create the tags and categories to classify the forms to keep them better organized. You can easily filter these tags and types in the column on the extreme left.
To create these tags and categories, click this help article.
8. Search Forms
Go to the search field at the top of the page if you want a specific form. If you know the form name, enter it. You can also enter any other relevant information to view the closest results.
9. New Form
Go to the + New Form button on the top right corner. This is the first step to creating a custom form. Move to the Builder tab now.
The Builder tab has a simple look. You can choose from the Classic Form or Group Form.
You need to click on any one of these to create brand-new forms.
Refer to the following help articles to create all three types of forms.
How to Create Classic Forms Within the Forms App?
Here is the step-by-step process for creating a classic form within the Forms application.
For those not familiar with Classic Forms, a classic form is a general form that provides each question on the same page, followed by a button to submit.
These are the most basic and popular types of online forms that we frequently spot on websites and landing pages.
Here is the process of creating a classic form.
Click on the + New Form button in the top-right corner.

Or click on the Builder tab.

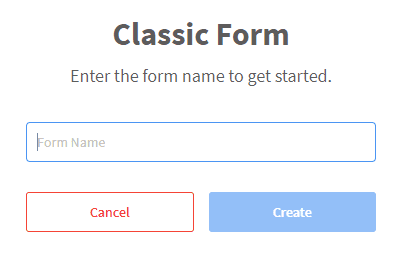
Next, select the form type by clicking on Classic Form.
Enter your form name.
You can name it according to the campaign you're running or just the objective of the Form.
Click the Create button.
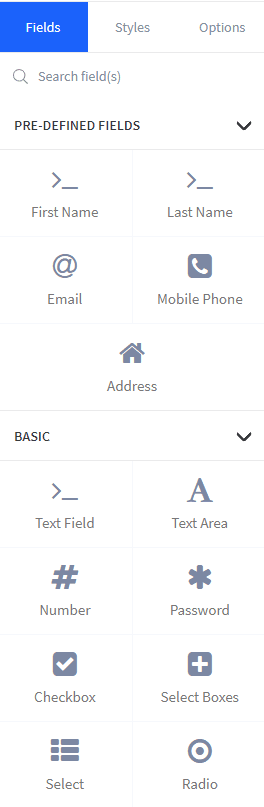
You can use a drag-and-drop form builder. Find the components in the Fields Styles and Options columns, which you can use to customize your Form further:
To know how to work with many elements and options, you can click the following help doc links.
Click here to learn how to add, move, and delete fields and publish the Form.
Help doc on creating Classic forms.
Templates
Every Form has a template, which largely depends on the purpose it's being used for. The Templates tab is the storehouse of pre-made form templates. You can quickly choose a template and start creating forms without reinventing the wheel. You can select a template according to a specific purpose, such as collecting leads or booking appointments. Since these templates are already set up, you won't need to spend time on them.

Look at the column on the left side, and choose a category. Under each category, there are numerous templates you can choose from. All you need to do is to select a template to start creating the Form you need. It's that simple to use the Forms App.
You can also locate a template using a search field at the top of the page.
Customizing the Forms App
Here are a few ways to customize your Forms App.
Column Customization
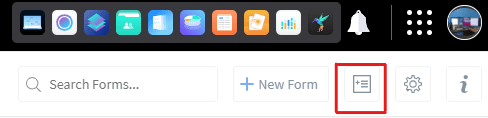
Be ready to explore fantastic options for customizing your experience on the Forms App. Similar to the My Forms tab, you can quickly locate the Manage Columns button in the top-right corner of the page:
Go to the menu, and set the columns you want to display within your table. You can remove the columns from your page view by clicking the blue check marks next to the corresponding column names.
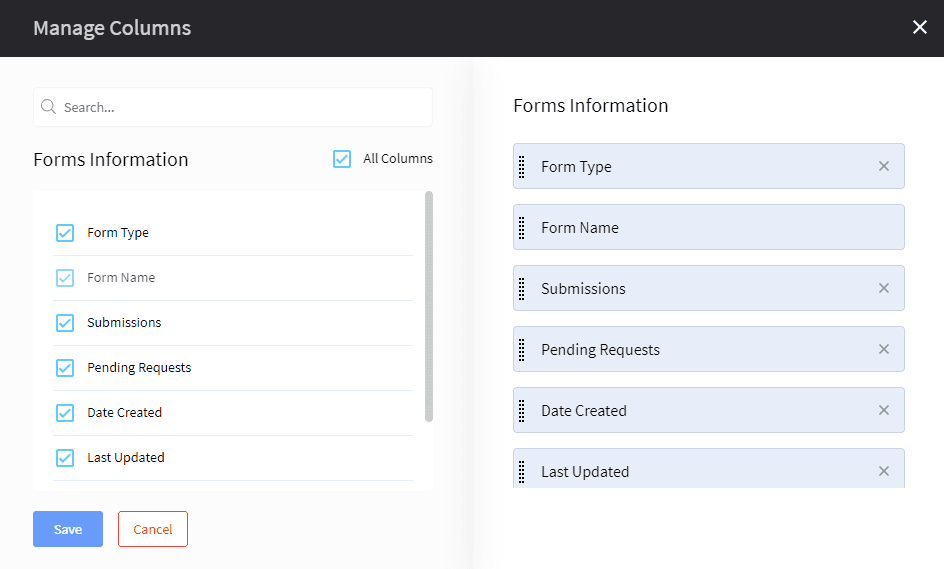
Note - Form Name can't be removed or moved up or down in the column.
You can use the section on the right if you want to drag and drop columns in your preferred order. Click the X to remove a column from the view.
Click Save at the bottom to save your customizations.
Similarly, you can follow the instructions and make other customizations.
How to Share & Embed Your Form?
Now that you have successfully created a form for your business objective, the next step is to share it with your audience. You can share or embed your Form using the Embed or IFrame options.
To embed, you need to post an HTML code in the text editor of your web page. It will integrate the Form and allow it to appear on the website exactly as it's designed so that users can interact with it on your website.
Final Words
DashClicks' Forms app creates custom forms for any data collection through easy-to-use forms. Moreover, you also get a drag-and-drop forms builder that's entirely white-label to make life easier.
Forms template also allows you to choose from hundreds of pre-built form templates. It will help you speed up your workflow by saving your time and ability to create forms on the fly.


.svg)


.svg)
.svg)
.svg)
.svg)
.svg)